 A few years ago, several of my friends and family members got together for a couple of stamp carving sessions. I love the idea of Hungarian Folk Art Stamps but I haven’t ever really seen any stamps to buy with Hungarian folk art themes. I am not a crafty person but the idea of hand-carving the exact folk art design I was looking for intrigued me. Could I actually do this? I have a friend who is very creative, crafty & artsy, and she knew exactly what we needed to get started! (Thanks, Kristin!)
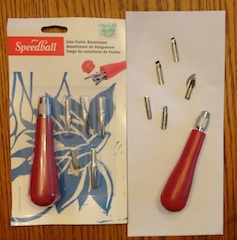
First we spent a sweet morning together buying supplies. Kristin picked out all the necessary tools and I paid the cashier. This was pretty risky as I wasn’t sure I would actually like hand-carving stamps but you have to have the tools to do it so I had to plunk down a little $$.
Water-based stamp pads
Lino cutters and handle
X-Acto knife or scissors for cutting the block
Tracing paper
We also needed:
Newspapers for surface
Pencil for tracing (a graphite drawing pencil works best)
Hungarian folk art (we have some at our website)
Very helpful additional items:
A friend who knows how to do this!
Folk art sketches you or an artsy friend have made.
Books from the library on stamp carving.
Website with very detailed step-by-step instructions
If you don’t already know what you are doing and you’re venturing into the stamp carving world without any experience, please do a little research! Your local library has how-to books and you can look around online for more detailed step-by-step directions.
1) Find the folk art image(s) you would like to use. Pick a less complicated one your first time.
2) Trace the image on tracing paper.
3) Cut the rubber to the desired stamp size using scissors or an X-Acto blade.
4) Turn the tracing paper over and place on the rubber block and rub over the back with a pencil to transfer the image to the stamp surface.
5) Use the lino-cutter to cut the outline of your folk art design. For larger areas to cut use the larger size cutters. For more fine detail use the smaller numbers. The numbers usually range from 1-5. First cut away the outline. It is important to cut away from you for your own safety.
6) Test out your work! Brush off the carving shreds from your stamp. This is important because otherwise all these little things get on your ink pad. Ink your stamp and then stamp on a sheet of paper. This will help you see where you need to remove more of the block (if you are looking for a very clean design). If you are ok with a rough-cut look than you decide how much more to trim.
7) For a clean imprint that is most predictable, mount the stamp on a piece of wood block. When unmounted, the rubber is pliable and may show “shallow” areas. Usually this is eliminated when mounted on a stiff surface.
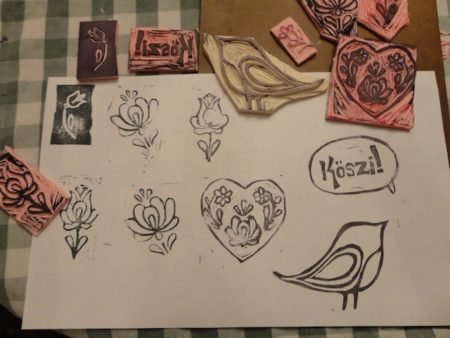
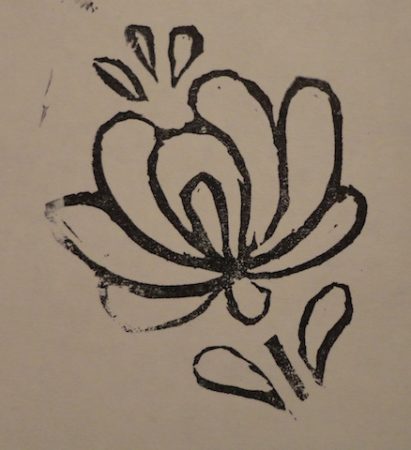
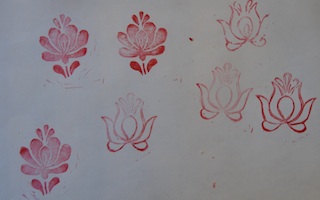
A sampling of what we created!
8) Clean the ink off your stamp with soap and water when done stamping.
9) Save your tracing paper art in a ziplock bag in case you need to make a replacement stamp.
10) Store your new stamps in a shoe box.
If you create hand-carved Hungarian folk art stamps we would LOVE to see your creation! Please send a photo and what you thought of the process to [email protected] or post a comment here!
We have made note cards and stamped packages with our new stamps.