By Rick Ellis
Like many of you, for years I was fascinated by the intricate folk art of decorating eggs in the Eastern European fashion using wax and dye. The amount of detail, precision, and time amazed me. Being the “King of Impatience” (as my friends would validate!!!), I never gave a thought to perhaps attempting this myself. I know they couldn’t even picture me sitting down and doing this (frankly neither did I!).
Then last year when Liz made a class available via Zoom with a wonderful teacher named Timea, I got up the courage to give it a try. Why not, I thought—what’s the worst thing that can happen? The class began and I nervously started etching my pencil design on my egg, thinking “This is going to take forever!!!!” (remember, I’m King of Impatience). But as I began to work through the process, I began to enjoy the peace and focus it provided, as well as the discipline to slow down if I wanted something worthy. Next came the application of the wax which was a bit intimidating but amazing, followed by the dying (ONE color!) I had seen people using the íróka tool but I still couldn’t understand how it worked. As I cleaned off my egg with the lighter fluid and saw what emerged, I was hooked!
This year I took another class with Timea where we attempted more than one color and again—do I have the patience to do this? Guess what? I DID! It’s so amazing what happens when we take risks and push ourselves.
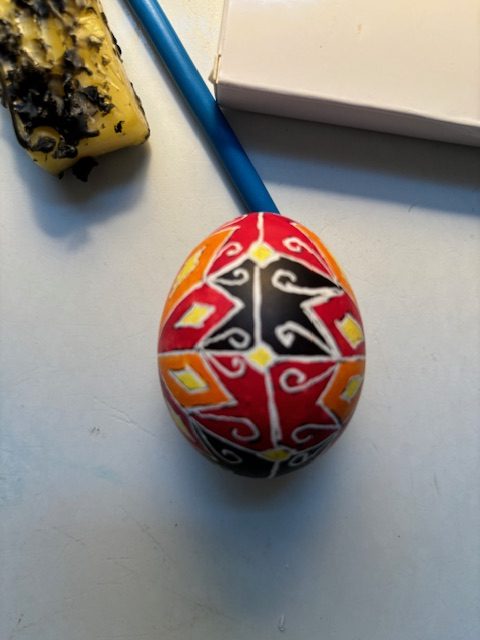
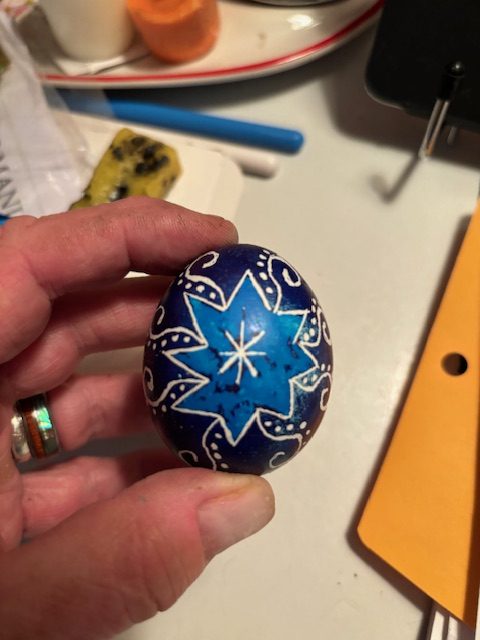
I have shared some photos with both Liz and Timea of what I have been trying to accomplish and with each egg, I learned something new—what to do or NOT to do! Timea also generously shared her time in answering my e-mails, making suggestions as well as encouraging me to keep up the good work!
When I was asked if I would be willing to write this newsletter discussing my learning process, I said I would be more than happy, perhaps encouraging people who are still reticent about attempting this to try it out, as well as pointing out what has worked well for me to perhaps save them some discouragement. That being said, here are some “tips” that I wanted to share—sort of my “Ten Commandments of the Egg Decorating Craft”!
- Try and choose eggs that do not have any rough spots on them, as I discovered that dye ends up being spotty and uneven on rough spots.
- Begin with a very simple line design and one color. This was plenty for me to take on initially and rewarding.
- The order of dying is the most challenging. Starting with the lightest color and progressing through each one, darker and darker, is critical. Also, remember your basic art lessons from school about what two colors together will create a new color (e.g., if you dye red and then blue, you’ll get purple for sure!)
- The íróka tool holds more wax than you think so you don’t have to refill it as often as you imagine, but you DO need to keep passing it frequently over the flame, as the wax sets up very quickly. Also I keep a piece of paper towel handy when I first load the kistla and pass it over the flames. I tap it onto the paper towel to avoid any big blobs coming out and overtaking my design (believe me, I have had this happen!). Just precautionary. This way you get rid of any big blots before beginning applying the wax in a more controlled way. I have also invested in an inexpensive set of three different íróka tools with different sized “funnels” that allow you to cover large areas with wax more easily than a super-fine funnel.
- If/when you get to more than one color, you have to talk out loud-–I’m not kidding! You have to get it in your head that the first color you want to protect is the one you will cover with wax! This may sound like common sense, but even Timea told me she has to do the same thing!
- Take your time and be patient (from The King of Impatience!)—but the best thing is you can stop at any point in the process. Nothing is going to go bad, so I love this aspect of this art. We all want to get to the end and the “big reveal” but it’s so worth breaking up the process if you, like me, rush through things.
- Remember to wash your waxed egg in a vinegar/water bath to make the egg more porous and accept the dye more intensely.
- Lighter fluid and flames do NOT mix! When you get to using the lighter fluid, be sure your candle is OUT!
- If you need inspiration, go on the internet and Google “Transylvanian egg decorating” images and you’ll find tons of ideas, charts, etc. Or just get creative and draw your own ideas.
- I have only used hard-boiled eggs at this point but I have since learned that the risk of the egg smelling if it breaks is too great. Working with a raw egg also has it’s challenges but might be the better way to go until you are ready to blow out your eggs. I know the blown-out egg is the best alternative but after doing all of my hard work, I’m not brave enough at this point to try and get the hole and take out the insides, risking breakage (maybe that will be my next challenge). There is a great suction tool available to do the emptying process which I purchased through Liz. Good luck to those of you who want to do this next level!
I cheer on all of you who have been holding back or have tried this unsuccessfully and given up. I hope perhaps my own experience will help you enjoy this folk art process as much as I have. And I bet many of YOU who have been working on this could continue my list with many of your own suggestions to help with the learning process.
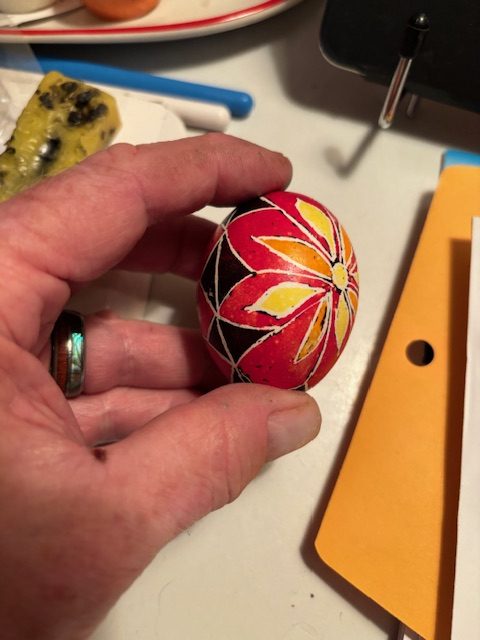
Meanwhile, enjoy your own personal journey! I’d love to see your designs—hope the ones I’ve shared will be of help to you!
Always,
Rick
If you want to read more about Timea’s story of her egg decorating journey, check it out here!